Colorful Glue Sun Catcher
Like so many of us these days, I am often inspired by projects I find while browsing Pinterest. I love, love, love to recycle things into craft projects! I’ve been saving plastic lids for a while now and have already made plenty of projects from them. But when I saw these sun catchers I knew I wanted to give them a go.
I originally saw this idea on a blog called Babble Dabble Do. The colors were just so eye catching and I knew it would make a great project for little ones. I also wanted to add in an element or two that would help preschoolers fine tune some motor skills, hence the beads and use of a sewing needle. Babble Dabble Do’s version is more toddler friendly if you prefer that route. The sun catcher itself is the same, but the beaded embellishments add a little extra challenge for your 4-5 year old.
Note: While this project doesn’t take long to make, it has a long dry time, about 5-6 days. While it is just regular white craft glue, a thick layer like this takes time to dry. The outer layer will dry first, locking in the wet glue underneath, not allowing as much air to touch it. Hence the drying must rely on evaporation, and without a lot of room for the moisture to escape, it slows the dry time considerably. I suggest turning this into two separate craft projects. The first one is making the sun catcher, and the second one a week later to embellish it.
You will need:
White craft glue (or school glue)
Plastic lid (cottage cheese, sour cream, yogurt, etc)
Liquid food coloring
Toothpick
Embroidery floss
Needle (Parents handle this if creating with young kids)
Pony beads
3 (4-hole) buttons
Place lid upside down on the table and fill it with glue. Add three drops of food coloring in three different places in the glue.
Use a toothpick to swirl the food coloring around in the glue.
This photo is an example of when is a good time to stop. The color will spread a lot more than this as it sits and if you swirl it too much you’ll end up with just a brown design instead of a colorful one.
The photo above is what my design looked like after an hour of sitting. See how the colors have begun to spread?
Now here’s the hard part. Put the lid somewhere it will remain undisturbed for 5-6 days. You can check it after 4 days by reaching into the lid then carefully pulling back the dried glue. Peel slowly and if you see wet glue, return it to its original position and let it dry longer. Once the design is completely dry, peel it out of the lid.
Parents: Thread the needle and poke it through the bottom of the sun catcher.
Pull the thread through, take off the needle and line up the two ends of the thread.
Repeat two more times for a total of three hanging strings about 8 or 9 inches long.
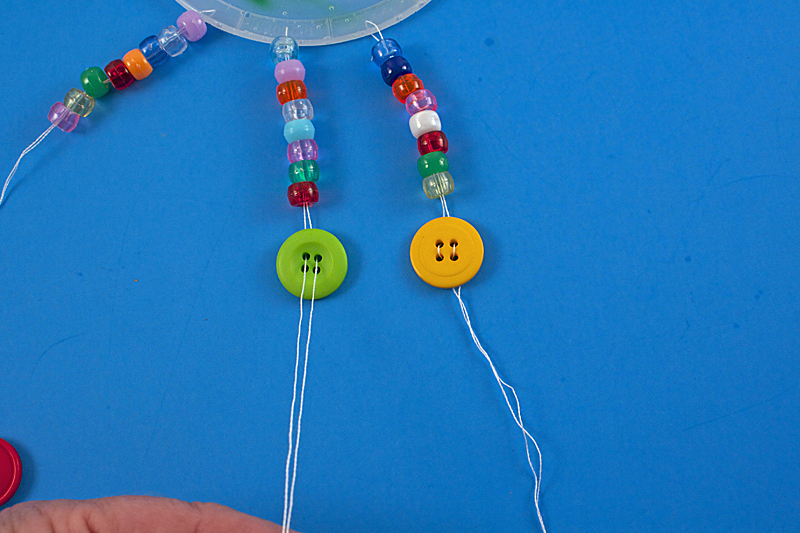
Now have your little ones thread some pony beads onto each set of strings; I used eight beads on each one.
Thread the two strings through a 4-hole button, running the thread up through two holes and back down through the other two holes.
Turn the button over and tie a knot in the string three times. Trim off the excess string.
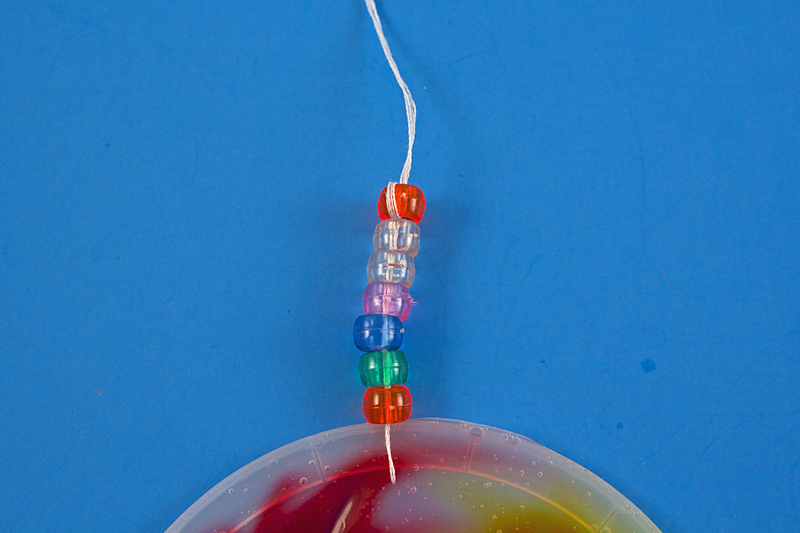
Thread a needle with one strand of embroidery floss. Poke the needle through the top of the sun catcher, tie that it a knot for the hanger. Thread several pony beads onto the hanger. I used seven.
Loop the string back through the final bead.
Pull that string tight. Now all you have to do is hang it up and marvel at its beauty!
 Project created by Amanda Formaro for Kix Cereal. Amanda is a well-known craft expert and author of the books “Rubber Band Mania” and “Duct Tape Mania”, the first two in a series of craft books for kids. She has been writing and crafting on the Internet for over fifteen years. Find out more on her blog, Crafts by Amanda, where she shares tutorials with step-by-step photos for adults and kids alike. Project created by Amanda Formaro for Kix Cereal. Amanda is a well-known craft expert and author of the books “Rubber Band Mania” and “Duct Tape Mania”, the first two in a series of craft books for kids. She has been writing and crafting on the Internet for over fifteen years. Find out more on her blog, Crafts by Amanda, where she shares tutorials with step-by-step photos for adults and kids alike. |


