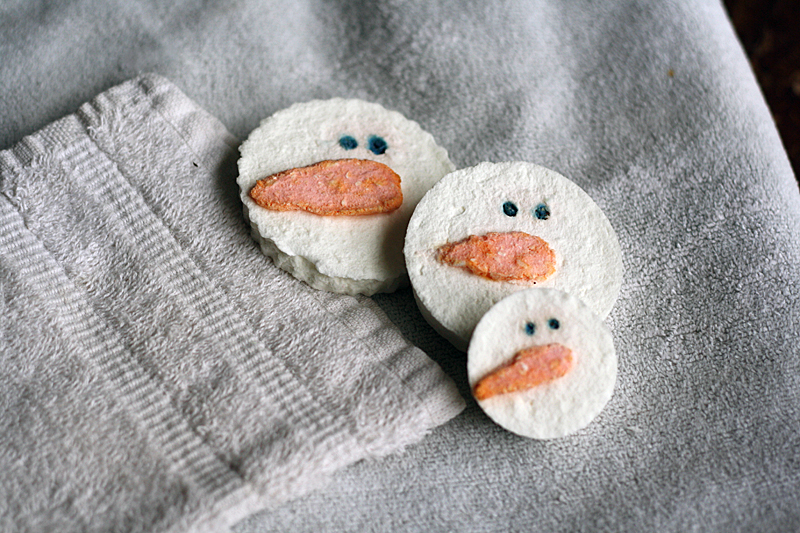
Snowman Soap Experiment
This super fun science experiment doubles as a cute craft that is great for DIY gift giving. Parents, you will probably be tempted to take a bar of Ivory soap to the office after witnessing this, just be warned, the office microwave will smell soapy clean afterward!
In this experiment you’ll discover that microwaving a bar of Ivory soap results in lots of oooo’s and ahhhh’s and probably some giggles too. Why does this work, and why only with Ivory soap and no other brands? As the story goes, a factory worker’s error many years ago caused air to be whipped into the soap during the manufacturing process. Consumers loved the new “soap that floats” and so Ivory kept the process from that day forward!
The air bubbles inside the soap contain water. When heated in the microwave, the water evaporates, bubbles are formed and the air that was trapped inside begins to expand. If you’d like to cover this in a science discussion with your kids, Steve Spangler Science has a great explanation.
Watch the video to see the soap expanding in action!
To make some snowman soap you will need:
1 bar Ivory soap
Food coloring: red, yellow, blue, green
Round cookie cutters
Wax paper
Two dishes or bowls and spoons
1 cup water
Toothpick
To get ready, be sure to cover your work surface with a plastic tablecloth or plenty of newspapers. This can be (but doesn’t have to be if kids crumble the soap carefully) a messy project!
Place the bar of soap on a paper plate. Alternatively, you can break the bar in half and do this in two batches.
Place soap in the microwave and turn on full power for one minute. The soap will begin to turn into what looks like pillowy clouds. Open the microwave and allow the expanded soap to relax for about 15-20 seconds. It will reduce in size.
Turn place of soap upside down into a bowl or dish. Feel around in the pillows as you will most likely find soap that has not yet expanded (if you put the entire bar in rather than breaking it in half). Place that bar back in the microwave and cook for another minute. Watch it carefully and remove once the expansion stops (if before the minute is up).
The expanded soap is rather light and actually quite papery in texture. Be careful! It crumbles easily so make sure you did put down that tablecloth. Have a cookie sheet lined with wax paper and your cookie cutters ready to go. Take a small amount of the soap (enough to fit in the palm of your hand) and place it into a second bowl.
Crumble the soap in both containers to a fine powder. To the container/bowl with the smaller amount of soap, add one drop of yellow and one drop of red food coloring. Add very small amounts of water to the soap and food coloring, mixing with a spoon, until you have an orange paste.
Mix the larger container of soap in a similar fashion without adding food coloring. Only add small amounts of water at a time. Less is better. You can always add more if you need it, but you can’t take it out if you put in too much!
Scoop some of the white soap into the round cookie cutters. Fill the cutter and level them off with a butter knife or icing spatula.Take a small amount of orange soap and manipulate it into a simple carrot nose and gently press onto the round white soap.
Use a toothpick to poke two holes for eyes in each snowman soap.
To the remaining orange soap in the bowl, add a drop of blue food coloring and a drop of red food coloring. Keep adding different colors, one drop at a time until the mixture is a dark gray. Pick up a small amount of the gray soap with the toothpick and carefully insert it into the eye holes you created and smooth it with your fingertip.
Allow your soaps to dry for 48 hours before using.
Amanda Formaro is a well-known craft expert and has been writing and crafting on the Internet for over fifteen years. Find out more on her blog, Crafts by Amanda, where she shares tutorials with step-by-step photos for adults and kids alike.


