Star Wars Treat Mix and Make-Your-Own-Droid
![]()
Star Wars fans are a devoted bunch. And why shouldn’t we be? We understand the awesomeness of a story that is so grand and so important to our collective culture that an entire day is named after the quintessential Star Wars quote, “May the force be with you.” Yes. May the 4th be with us all. Always.

STAR WARS TREAT MIX
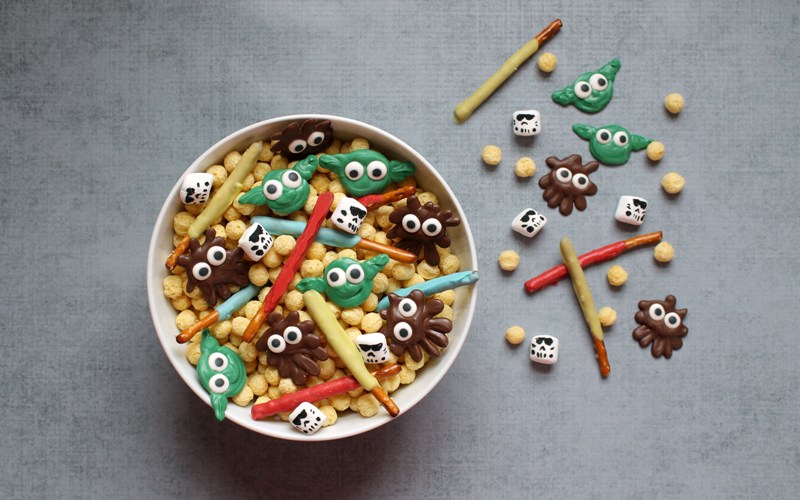
Star Wars groupies deserve a snack mix like no other in our galaxy. They deserve a snack mix from a galaxy far, far away. They deserve one that honors these charming characters we know and love so well. They deserve one that honors them in chocolate.
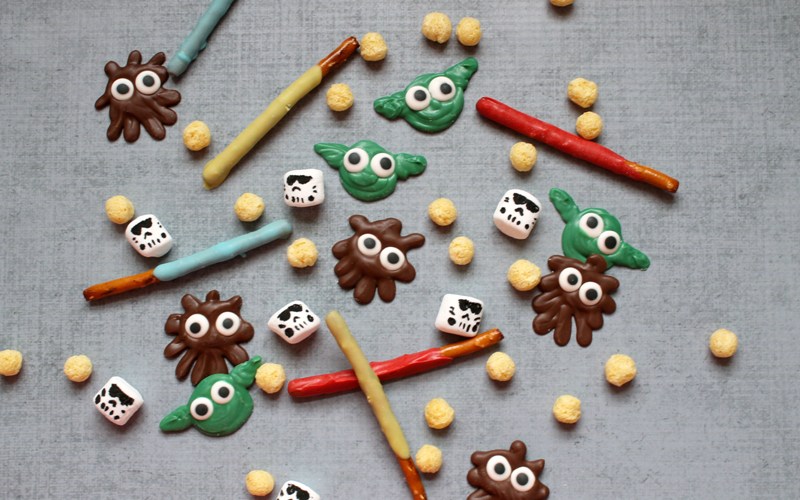
This yummy mix of sweet and salty is truly the snack mix for Star Wars enthusiasts. Pick and choose just a couple of the elements for your mix, or make everything: The stars, Yoda, lightsabers, Chewbacca, and those not-so-nice Stormtroopers.
To make every bit of the Star Wars treat mix:
You will need:*
Kix cereal
Candy melts (green for Yoda, brown/chocolate for Chewie, and neon green, blue and/or red for the lightsabers)
Disposable decorating bags
Scissors
Baking trays
Wax or parchment paper
Pretzel sticks
Candy eyes
Mini marshmallows
Black food coloring pen
Vegetable shortening (optional)
Microwave-safe bowls or cups
*Find candy melts, 12-inch disposable decorating bags, candy eyes and the food coloring pen online or in the craft store.
How to make…
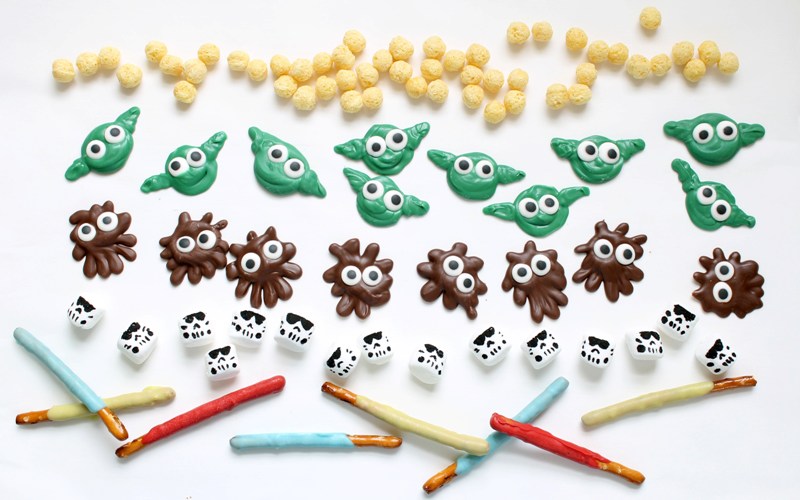
Stars. This one is easy. Just use Kix Cereal.
Yoda. Line a baking tray with wax or parchment paper and set aside. Place ½ to ¾ cup of green candy melts in a disposable decorating bag. Microwave for 90 seconds at 70 percent power. Massage the bag and continue to microwave at 15 second intervals until fully melted. Snip off ¼-inch from the tip.

On the wax paper, pipe a small circle and two ears as shown. Immediately press two candy eyes on the circle. Repeat to fill the tray, and let the candy set at room temperature for about an hour. TIP: Candy melts melt at a low enough temperature that the bag should not be hot to touch, but use caution before handing to the kids and test the temperature.

Chewbacca. Follow the same instructions for “Yoda,” but use chocolate or brown candy melts and pipe a messy circle for Chewie’s head.

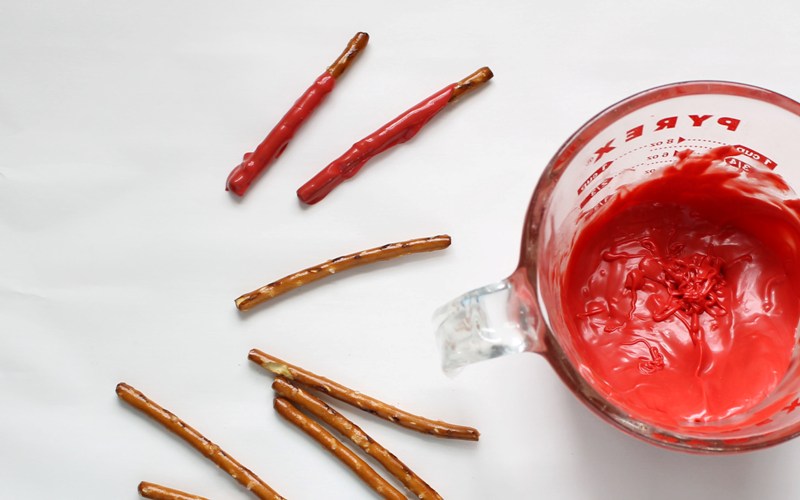
Lightsabers. Line a baking tray with wax or parchment paper and set aside. Place ½ cup of blue, red or neon green candy melts and 1 teaspoon of vegetable shortening (optional, but shortening thins the melts to make them more “dippable”) in a microwave-safe bowl or cup, preferably one that is narrow but deep. Melt in the microwave for 90 seconds at 70 percent power. Stir and continue to microwave for 15 second intervals until fully melted. Hold the end of a pretzel stick and dip the other end in the melts, leaving only about ½ inch of pretzel uncovered. TIP: If the melts aren’t deep enough to dip the pretzel, tilt the bowl or cup so the melts pour along the side. Gently tap the pretzel on the side of the bowl or cup to remove excess candy melts. Place on the baking tray and let harden well, about an hour.
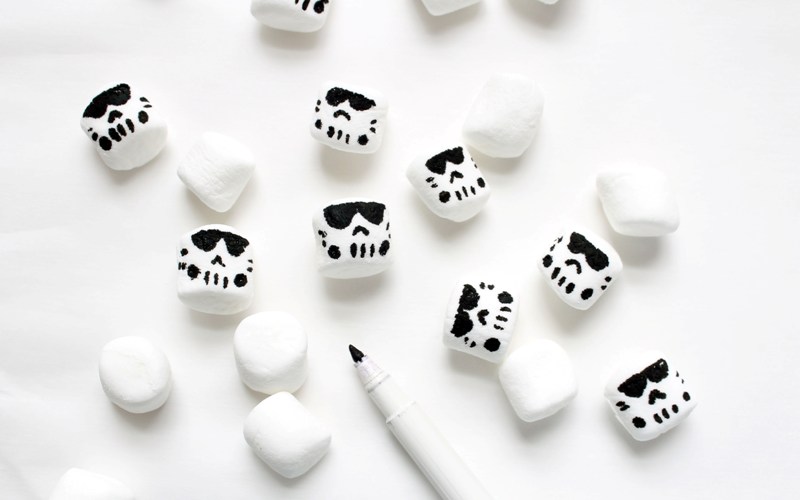
Stormtroopers. Use a black food coloring pen to draw the faces shown on mini marshmallows. TIP: You may also use regular-size marshmallows to make the drawing easier.
MAKE-YOUR-OWN DROID™
™
If you caught a glimpse of the pile of Droids the Jawas collected in their Sandcrawler on Tatooine, you know quite a few bits and parts and labor go into making a Droid. The genius of Star Wars is seen in these Droids. Each may be an expressionless metal robot, yet each has their own unique character.
What would your Droid look like? What kind of personality would they have? Would they be brave and daring like Artoo, or would they be a bit more concerned with their own comfort and pride, like C-3PO? Here, you are the engineer. Your job is to create a Droid.
To make your own Droid:
You will need:*
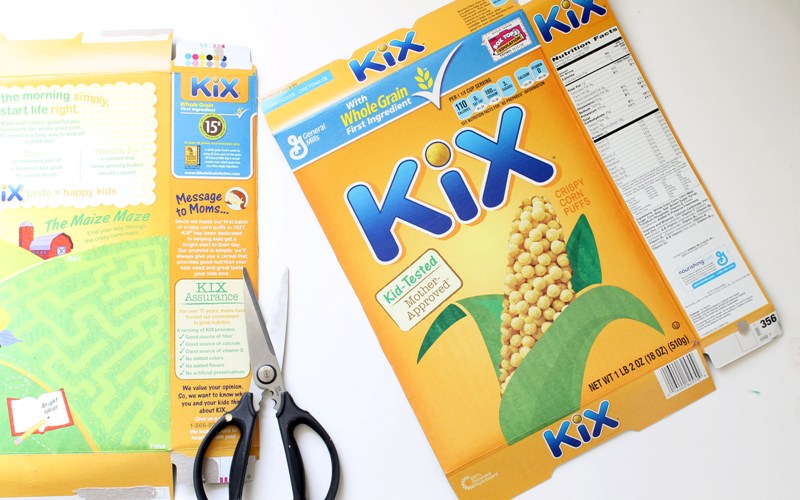
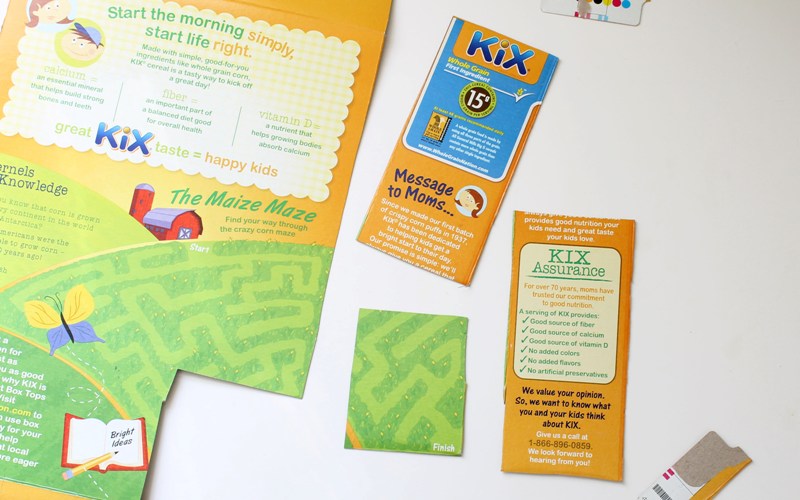
Cereal box (a 12 1/2 by 9 ½-inches box used here)
Scissors
Large duct tape, any color (white 2-inch wide tape used here)
Small duct tape, any color (blue 1/2-inch wide tape used here)
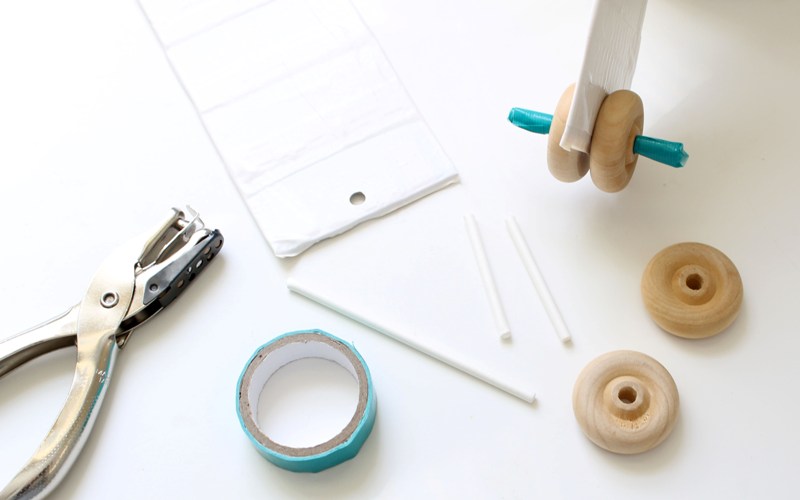
Six 1 1/2-inch toy wood wheels
Lollipop sticks
Ruler
Pencil
Hole punch
Craft knife (optional)
Stickers, googly eyes, bottle caps and glue, or any other items to decorate your Droid
*Find the wheels, lollipop sticks, stickers and googly eyes in the craft store. Find the duct tape in the craft store or a home renovation store.
TIP: To simplify the Droid, omit the wheels and axle.

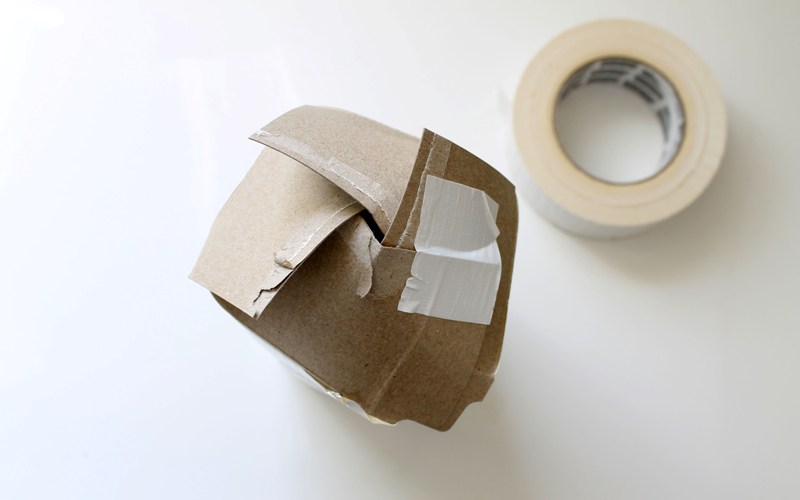
To make the body: Open the box completely, gently pulling apart both ends and the seam at the side. Cut the box in half.
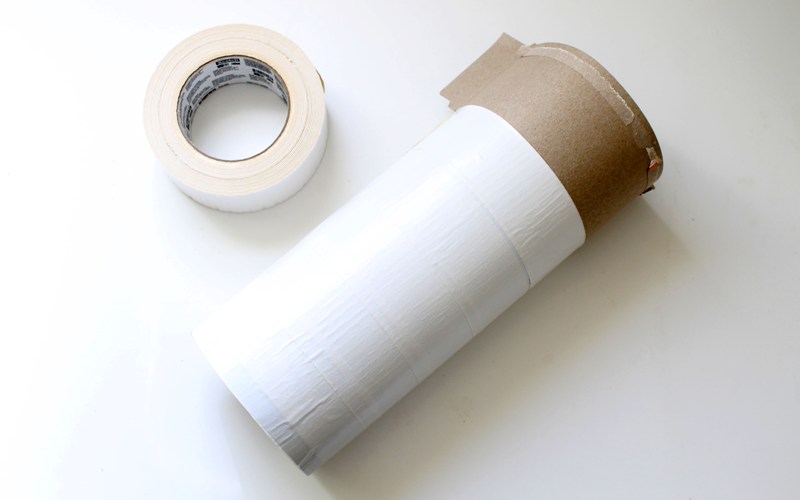
Take one half (the front of the box plus one side), and with the side flap at the top, bend the box into a cylinder, overlapping the ends.

Adhere a piece of large duct tape to hold the cylinder closed. Use the same duct to wrap the entire cylinder with one or two layers of tape. Leave the top flap unwrapped for now.
Cut slits in the flap in three places just down to the duct tape. One in the front, and one slit on each side (the back has the slit already from the flap opening).

Overlap each section created by the cuts, securing with duct tape as you go. Cover the top with more duct tape. Make sure the whole outside is covered with duct tape. Set aside.

To make the legs: From the remaining box piece, cut two rectangles about 3 by 6 ½-inches. (For these, I cut off the remaining side of the box and cut that in half.) Cut one smaller rectangle about 2 ½ by 3 ½ inches. Cover each rectangle entirely with the duct tape.
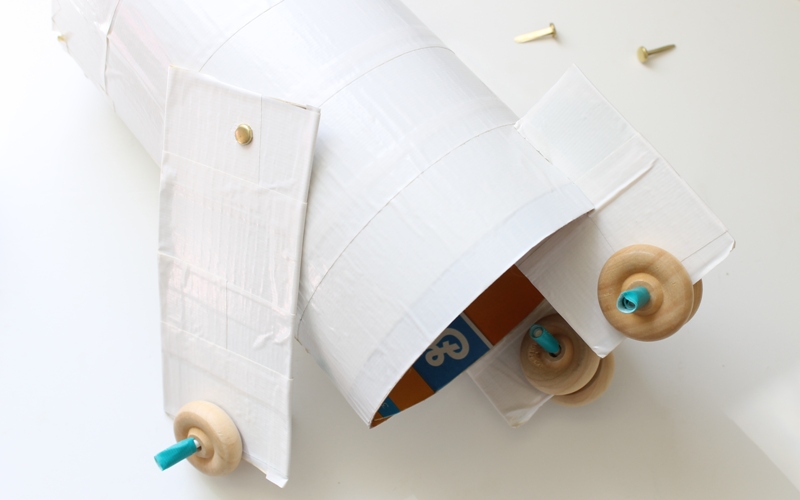
Take one of the larger pieces. Punch a hole ¼-inch from the bottom of the rectangle. (It may take some muscle to get through the duct tape.) Snap a lollipop stick to get a 2-inch piece. Thread the stick through the hole in the rectangle and put a wheel on each side. Wrap a piece of duct tape (about 6-inches long) around each end until it’s thick enough so the wheels don’t slide off. Make sure not to tape the actual wheels, and make sure there are a few millimeters of space around each wheel so they have room to move. Repeat with each of the other legs.
To attach the legs: Punch a hole at the top of each of the two longer legs. Hold each up to the sides of the Droid so that the wheels move freely under the body. Mark the hole on the body with a pencil. Use a craft knife or the tip of the scissors (grown-ups should do this) and poke a hole in the body. Attach each leg with a brass fastener. If you need to, use a small piece of duct tape to secure the leg in the right position to the body. Next, cut a 1-inch slit at the top of the third leg and a corresponding 1-inch slit at the front of the Droid. Slide the leg into the slit at the front.
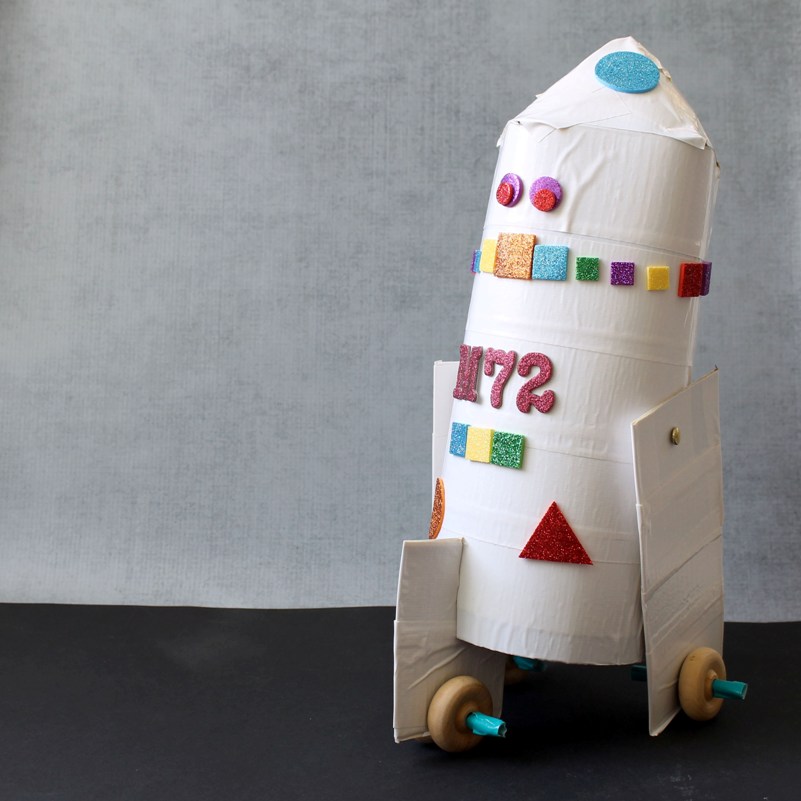
Decorate! Now, use shape stickers, knobs or caps, googly eyes, letters or numbers (note mine is “M72,” my initial and, um, the year I was born), or anything you like to decorate your Droid!
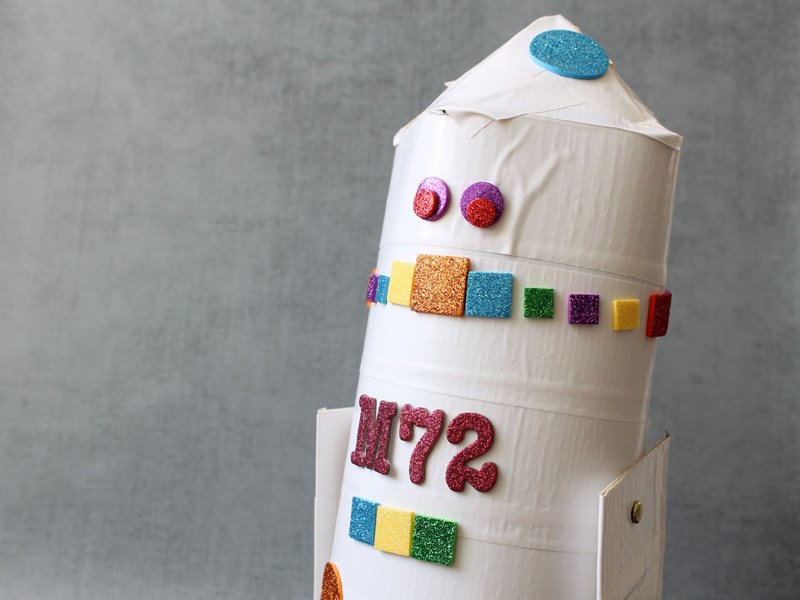
My Droid has something to tell you:
![]()
Meaghan Mountford, author of Sugarlicious: 50 Cute and Clever Treats for Every Occasion, has been creating crafty sweets for 15 years. She is especially fond of decorating cookies, marshmallows and putting sweets on sticks. See more on her blog, the decorated cookie.